What to Expect During a Professional Radon Fan Installation
Why the Fan Matters in Radon Mitigation
When a radon test comes back high, most homeowners in St. Louis know they need a mitigation system. What many don't realize is how much the success of that system depends on a single component: the fan. A radon fan installation is not just about mounting a motor and turning it on. It involves careful decisions about location, pipe routing, and electrical work. Getting those details right is what separates a system that works for decades from one that needs repairs in a year.
I've seen houses where a contractor slapped a fan in the attic without thinking about condensation. I've also seen crawlspace installations that were done so cleanly you barely notice the equipment. The difference comes down to experience and understanding how air moves through soil and through a house. A proper radon fan installation treats the fan as the heart of an active soil depressurization system. If the heart is weak or placed wrong, the whole system underperforms.
Understanding Active Soil Depressurization
Before we talk about the fan itself, it helps to understand how a radon mitigation system works. The most common method is sub-slab depressurization. A pipe is run through the basement slab or into the crawlspace, pulling air from below the house. That air contains radon gas, which is drawn up through the soil pipe and exhausted above the roofline. The fan creates the negative pressure that keeps radon from entering the living space. Without that continuous suction, radon seeps back in through cracks and gaps.
This is where fan installation becomes critical. The fan motor must be sized for the specific conditions of the house. A fan that is too small won't pull enough vacuum under the slab. Too large, and it can create noise issues or even pull conditioned air out of the house. Experienced mitigation contractors measure things like soil porosity and the number of suction points before selecting the fan. In St. Louis, where clay soils are common and basements vary in age, that judgment matters.
Where the Fan Goes: Location Trade-Offs
One of the first decisions in any radon fan installation is where to place the fan. The ideal spot is outside the living envelope, often in an attic, garage, or outdoors. Indoor installations are possible but require careful sealing and code compliance. Each location has trade-offs. Attics keep the fan out of sight but expose it to temperature extremes. A fan in an unheated attic can freeze in winter if condensation collects in the discharge point. Outdoor installations need weatherproof housings and protection from debris. Crawlspace installations keep everything hidden but make service access harder.
I worked on a house in the Shaw neighborhood where the only option was a crawlspace. The clearance was maybe 18 inches. The mitigation contractor had to lay on his back to bolt the fan flange to the sub-slab pipe. That job took twice as long as a basement install, but the system still passed post-installation verification on the first try. The key was using a manometer to confirm the fan was pulling the right pressure before finishing the job.
Electrical and Venting Requirements
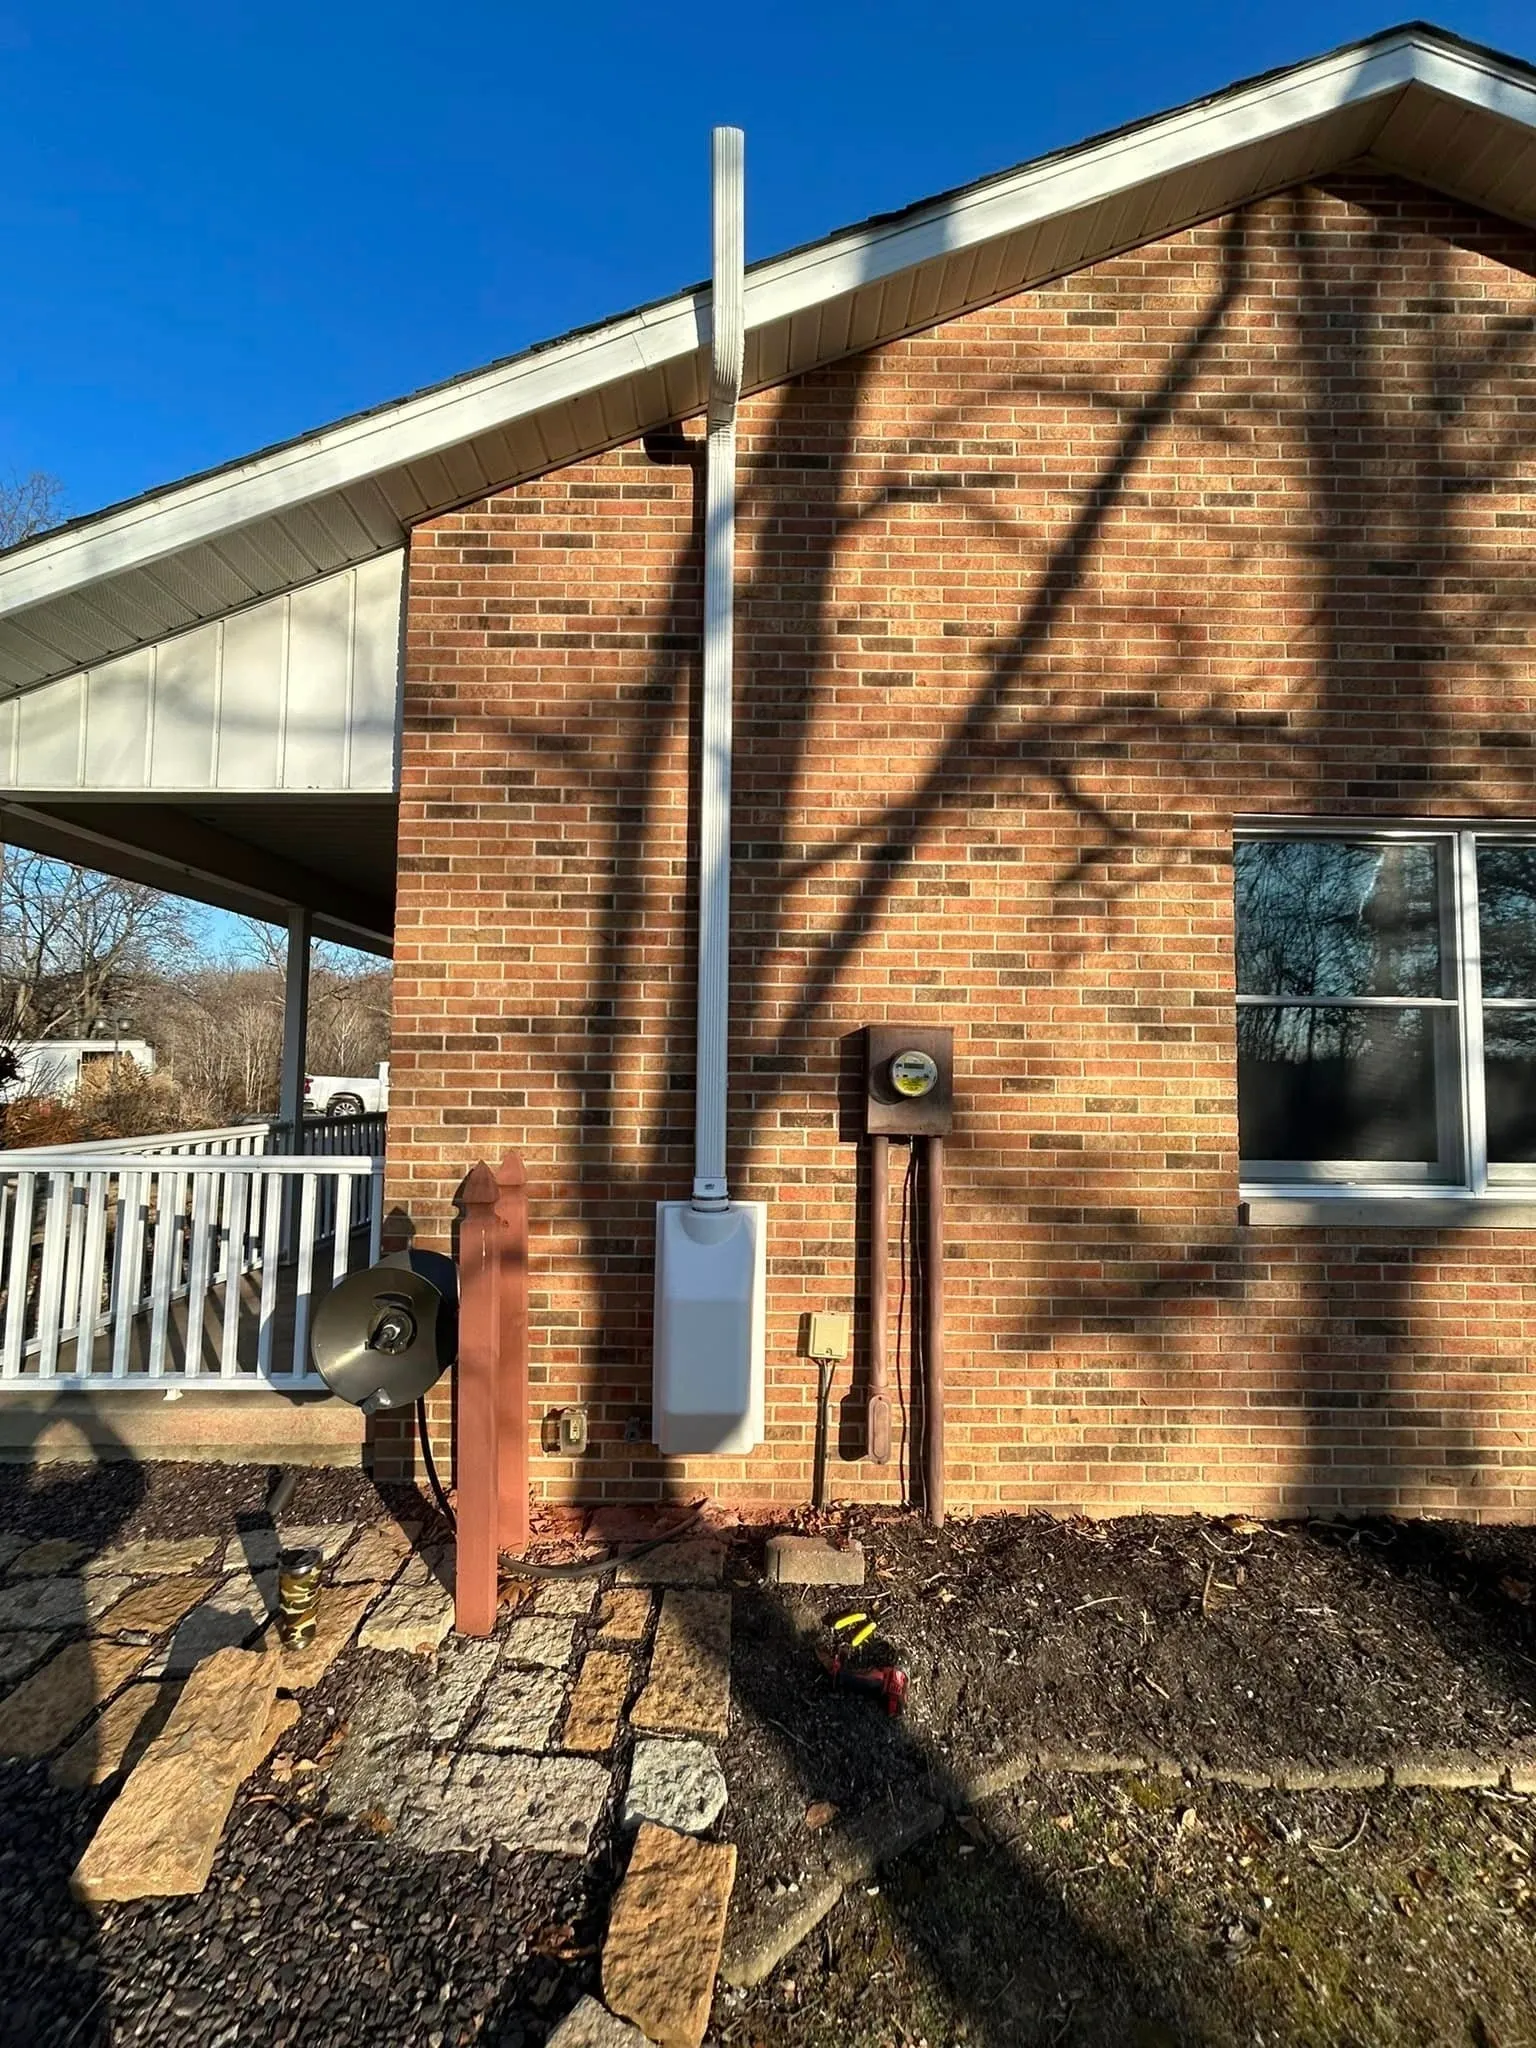
A radon fan installation is not a DIY electrical project unless you know code. Most fans run on standard 120-volt circuits, but they need to be on a dedicated outlet with proper grounding. Some local codes require a disconnect switch near the fan for service safety. In St. Louis, the city has adopted the International Residential Code, which has specific rules about radon vent termination. The discharge point must be at least 10 feet from any window, door, or opening into the house. It also has to be above the roofline in most cases to prevent re-entrainment of radon gas.
I've seen installations where the pipe was run out a basement window well and terminated three feet off the ground. That violates code and defeats the purpose. The fan may run fine, but the radon gets pulled back into the house through open windows or soffit vents. A proper fan installation includes routing the soil pipe to a safe discharge point, often through the garage roof or a sidewall. The pipe also needs to be sloped so condensation drains back to the suction pit rather than pooling in the fan motor.
Post-Installation Verification: The Real Test
Once the fan is running, the work isn't done. Post-installation verification is a standard step for any reputable mitigation contractor. This involves a second radon test, usually done with a continuous monitor or a radon detection kit left in place for at least 48 hours. The goal is to confirm that radon levels have dropped below the EPA action level of 4 picocuries per liter. In many cases, good systems bring levels down to 1 or 2 pCi/L.
During verification, the manometer is read to check that the system is maintaining proper vacuum. A typical active soil depressurization system should show about 0.5 to 1.0 inches of water column on the gauge. If the reading is lower than expected, it may indicate leaks in the pipe or a fan that is underpowered. If it's much higher, the fan may be oversized or the suction pit may be clogged. These are the details a professional catches before signing off on the job.
Maintenance and Longevity of the Fan
Fans in radon mitigation systems are built to run continuously for years. Most use sealed bearings and draw very little power, often less than a standard light bulb. But they are not maintenance-free. Debris can accumulate in the fan housing over time. Insects or small animals can nest in the discharge point. The fan motor itself can wear out after a decade or more. Regular checks of the manometer every few months can alert you to problems before radon levels rise again.
I recommend that homeowners in St. Louis have their system inspected annually by a mitigation contractor. That inspection includes checking the fan operation, cleaning the intake screen, and verifying the discharge pipe is clear. It's a small investment that protects the health of everyone in the house. A system that is ignored can fail silently, and you won't know until the next radon test shows high numbers again.
Choosing a Mitigation Contractor
Not all contractors treat radon fan installation with the same level of care. Some treat it as a simple plumbing job. Others, like Air Sense Environmental in St. Louis, treat it as a whole-house performance issue. They consider the soil type, the foundation design, and the local climate. They also guarantee their work with post-installation verification, which means you don't pay until the numbers confirm success.
When you interview a contractor, ask about their experience with sub-slab depressurization specifically. Ask how they size the fan and where they plan to run the discharge point. A good contractor will explain their reasoning and show you a manometer reading during the final walkthrough. They should also provide documentation of the pre- and post-mitigation radon test results.
Final Thoughts on Radon Fan Installation
A radon mitigation system is only as good as its fan installation. The fan creates the vacuum that keeps radon gas out of your breathing air. If it is undersized, poorly placed, or improperly vented, the whole system fails. The good news is that a properly executed radon fan installation, done by an experienced contractor, can reduce radon levels by 99 percent or more. That is a proven, reliable solution backed by decades of EPA research and real-world success in homes across the country.
If you live in St. Louis and are considering radon mitigation, take the time to understand what goes into the fan installation. Ask questions. Look at the manometer after the job is done. And make sure the contractor includes post-installation verification in the scope of work. That simple step is the only way to know for sure that your family is breathing safer air.